How to use Drupal 8's off-canvas dialog in your modules
Learn how to use Drupal 8's off-canvas dialog to improve the user experience of your modules.
The goal of this tutorial is to show how to use Drupal 8.5's new off-canvas dialog in your own Drupal modules.
The term "off-canvas" refers to the ability for a dialog to slide in from the side of the page, in addition to resizing the page so that no part of it is obstructed by the dialog. You can see the off-canvas dialog in action in this animated GIF:
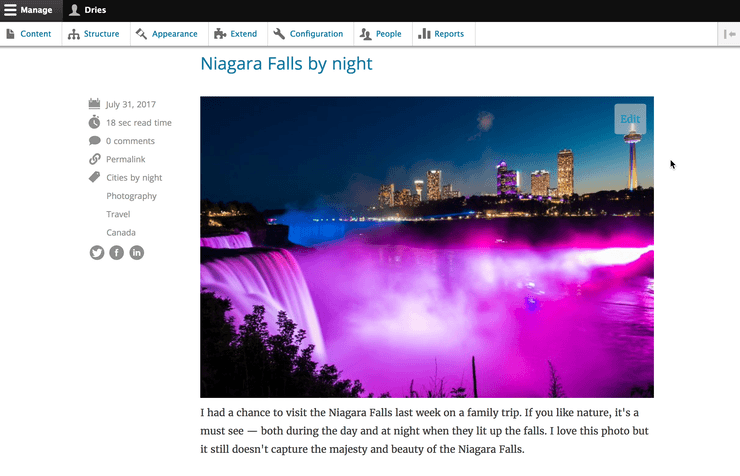
This new Drupal 8.5 feature allows us to improve the content authoring and site building experience by turning Drupal outside-in. We can use the off-canvas dialog to enable the content creator or site builder to seamlessly edit content or configuration in-place, and see any changes take effect immediately. There is no need to navigate to the administrative backend to make edits. As you'll see in this tutorial, it's easy to use the off-canvas dialog in your own Drupal modules.
I use a custom album module on https://dri.es for managing my photo albums and for embedding images in my posts. With Drupal 8.5, I can now take advantage of the new off-canvas dialog to edit the title, alt-attribute and captions of my photos. As you can see in the animated GIF above, every photo gets an "Edit"-link. Clicking the "Edit"-link opens up the off-canvas dialog. This allows me to edit a photo in context, without having to go to an another page to make changes.
So how did I do that?
Step 1: Create your form, the Drupal way
Every image on https://dri.es has its own unique path:
https://dri.es/album/<album-name>/<image-name>
I can edit my images at:
https://dri.es/album/<album-name>/<image-name>/edit
For example, https://dri.es/album/niagara-on-the-lake-2017/niagara-falls-by-night-1 gives you the image of the Niagara Falls. If you have the right permissions you could edit the image at https://dri.es/album/niagara-on-the-lake-2017/niagara-falls-by-night-1/edit (you don't ?). Because you don't have the right permissions, I'll show you a screenshot of the edit form instead:
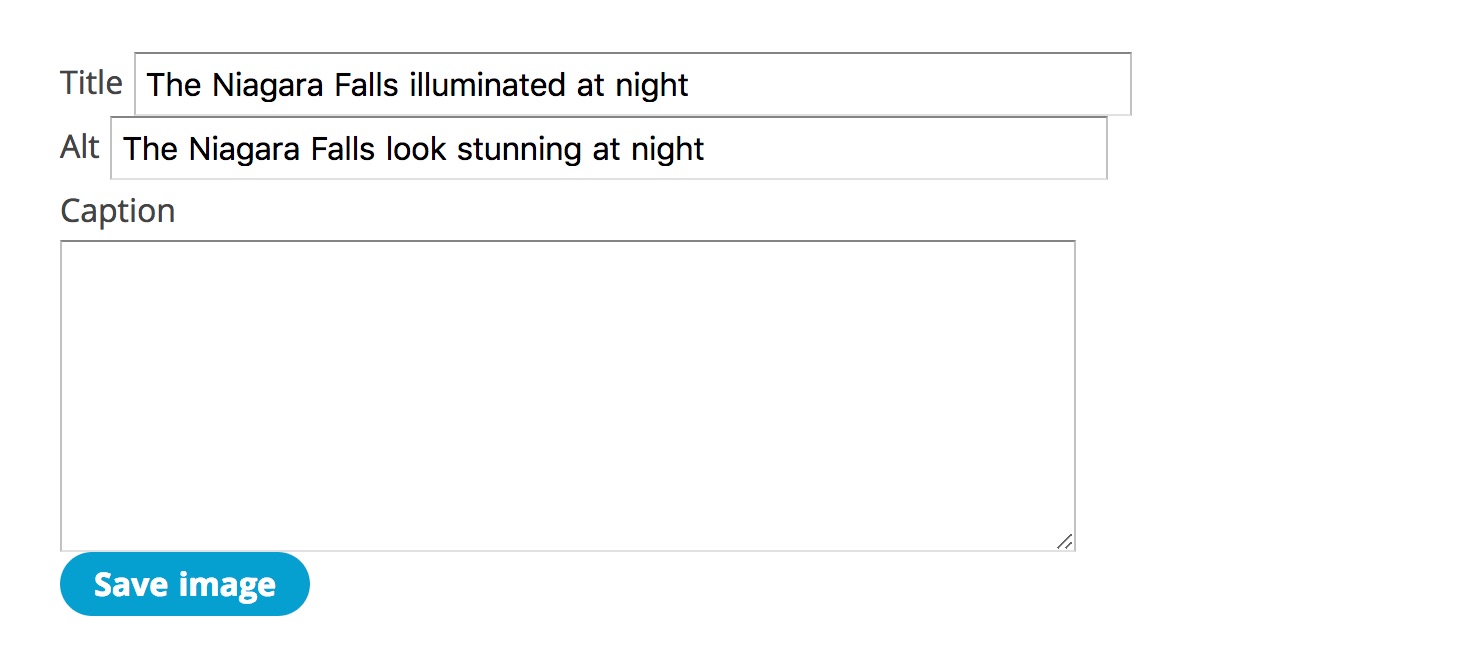
I created those paths (or routes), using Drupal's routing system, and I created the form using Drupal's regular Drupal form API. I'm not going to explain how to create a Drupal form in this post, but you can read more about this at the routing system documentation and the form API. Here is the code for creating the form:
<?php

namespace Drupal\album;

use Drupal\Core\Form\FormBase;
use Drupal\Core\Form\FormStateInterface;
use Drupal\album\Image;
use Drupal\Core\Url;

class ImageEditForm extends FormBase {

  public function getFormId() {
    return 'album_edit_image';
  }

  public function buildForm(array $form, FormStateInterface $form_state, $dir = NULL, $img = NULL) {
    $image = Image::loadImage("$dir/$img");

    $form['path'] = [
      '#type' => 'hidden',
      '#value' => $image->getUrlPath(),  // Unique ID of the image
    ];
    $form['title'] = [
      '#type' => 'textfield',
      '#title' => t('Title'),
      '#default_value' => $image->getTitle(),
    ];
    $form['alt'] = [
      '#type' => 'textfield',
      '#title' => t('Alt'),
      '#default_value' => $image->getAlt(),
    ];
    $form['caption'] = [
      '#type' => 'textarea',
      '#title' => t('Caption'),
      '#default_value' => $image->getCaption(),
    ];
    $form['submit'] = [
      '#type' => 'submit',
      '#value' => t('Save image'),
    ];

    return $form;
  }

  public function submitForm(array &$form, FormStateInterface $form_state) {
    $values = $form_state->getValues();

    $image = Image::loadImage($values['path']);
    if ($image) {
      $image->setTitle($values['title']);
      $image->setAlt($values['alt']);
      $image->setCaption($values['caption']);
      $image->save();
    }

    $form_state->setRedirectUrl(Url::fromUserInput('/album/'. $image->getUrlPath()));
  }
}

?>
Step 2: Add an edit link to my images
First, I want to overlay an "Edit"-button over my image:
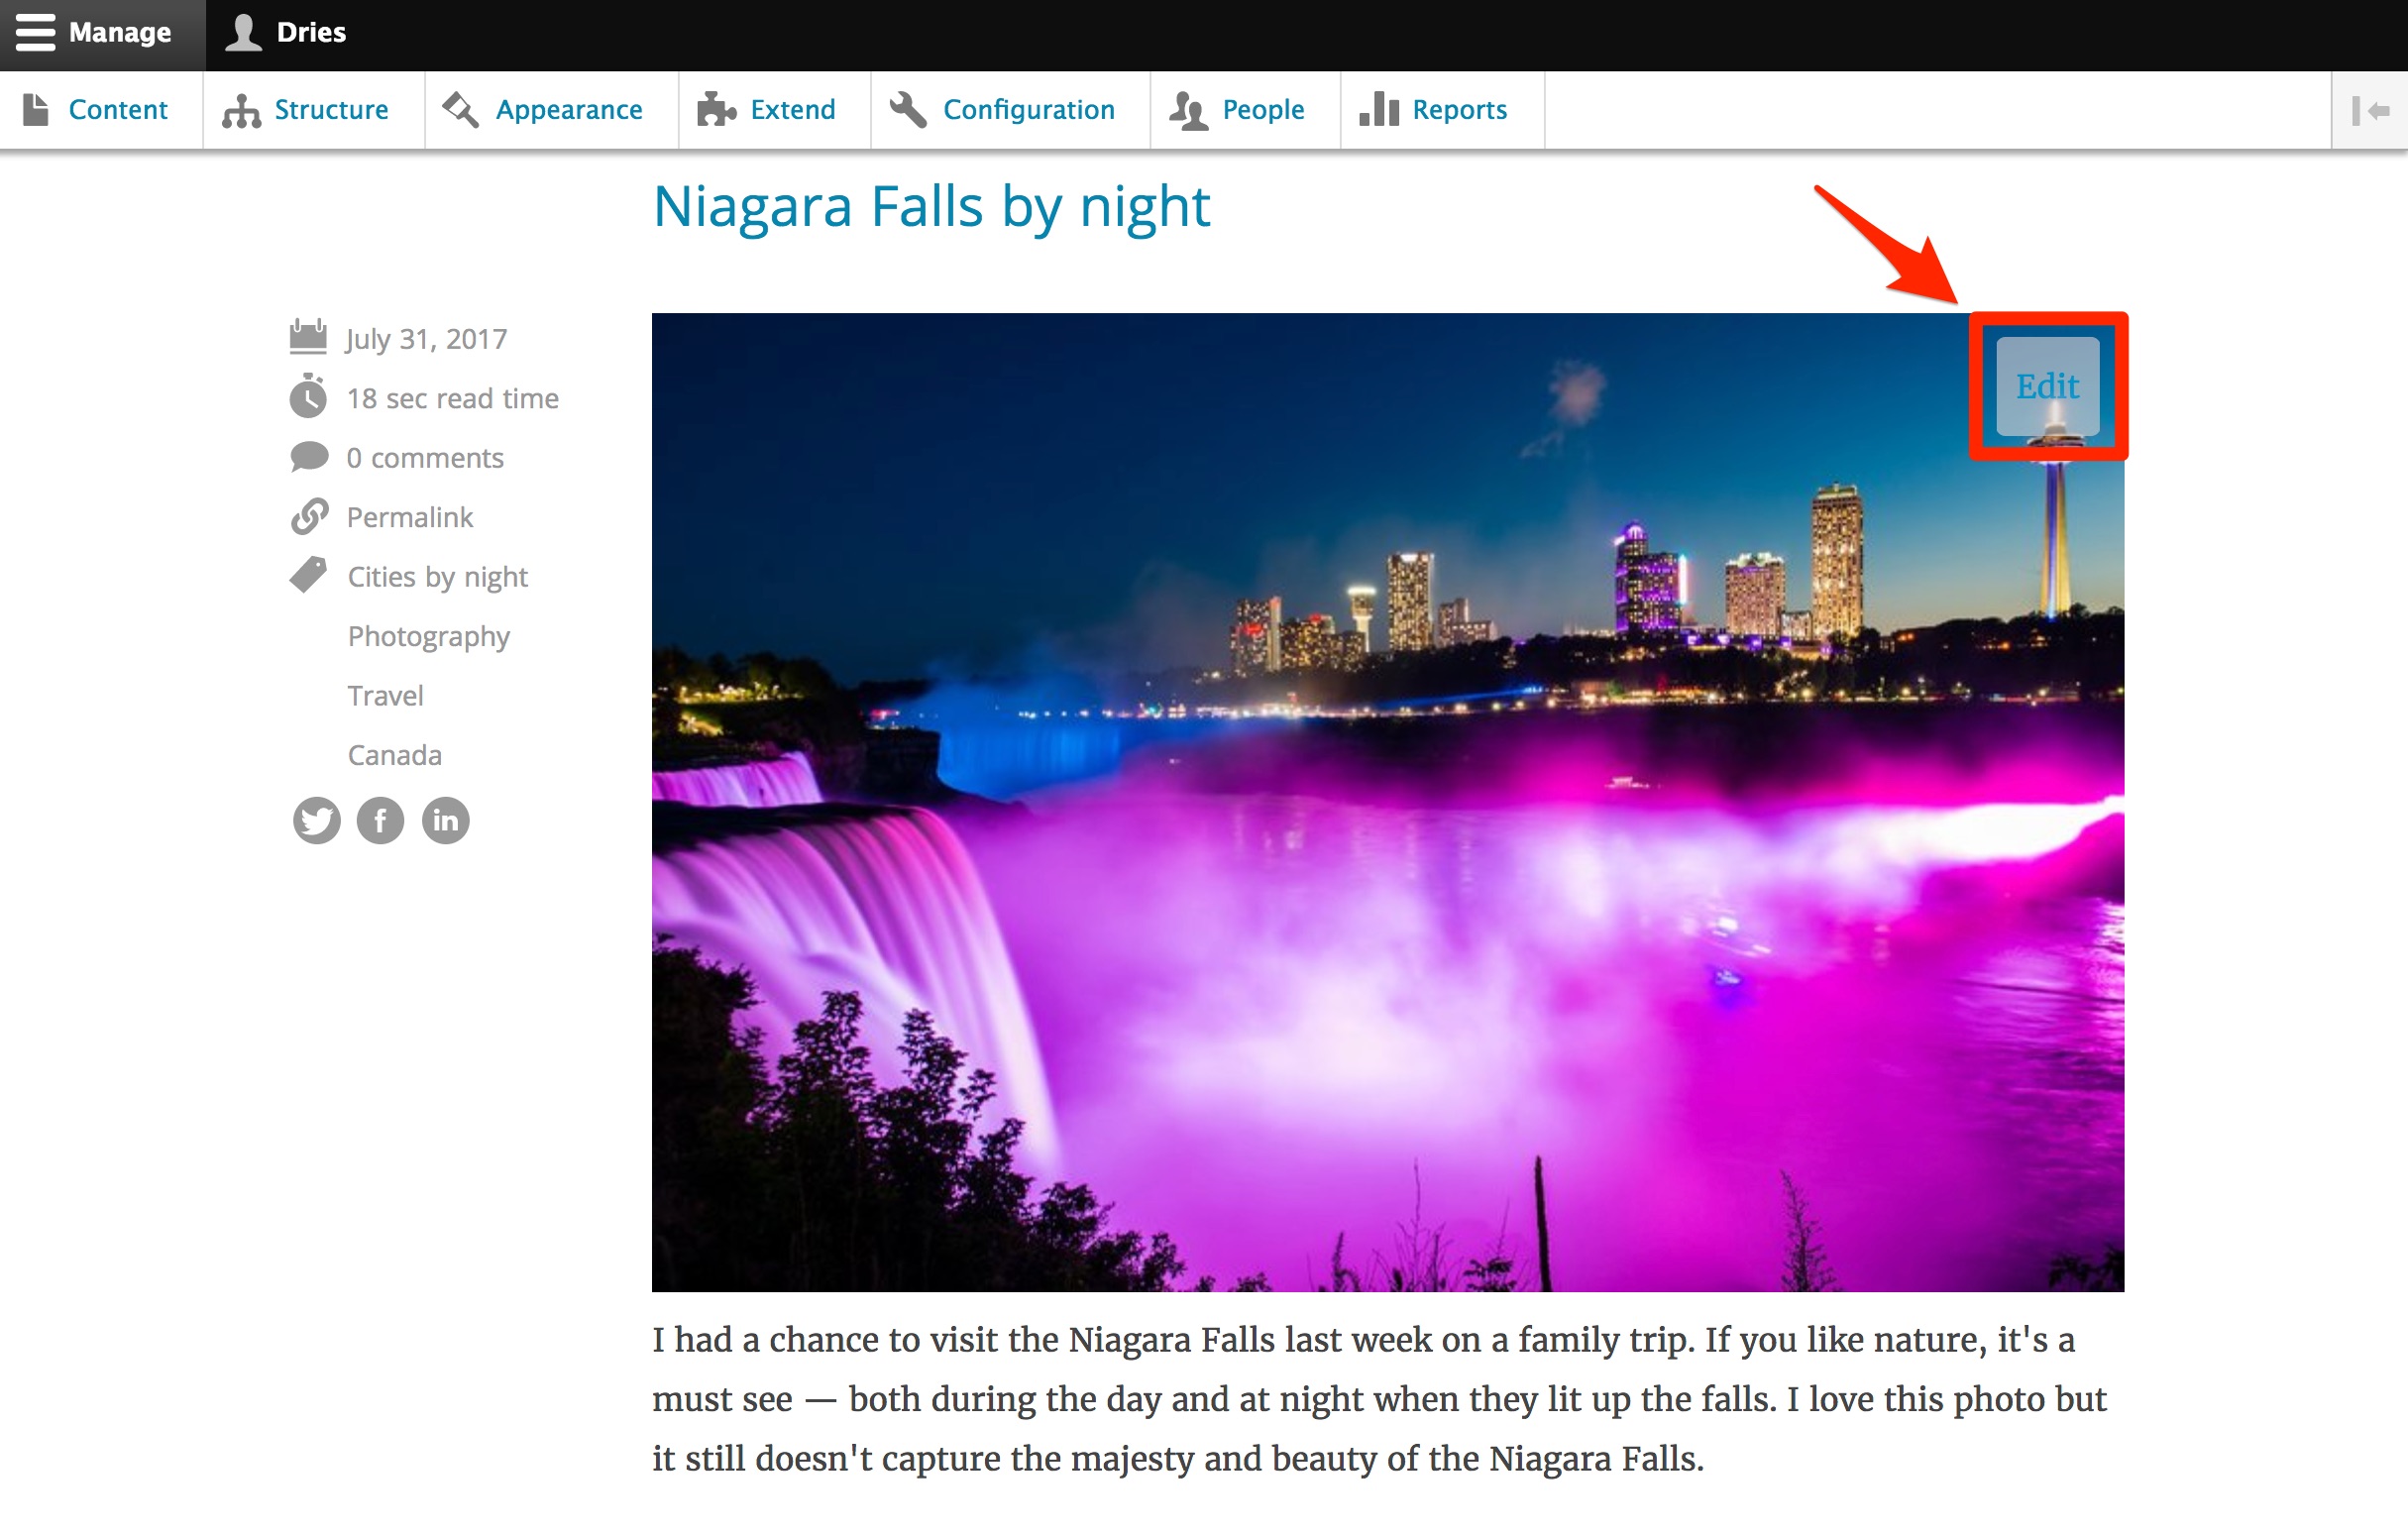
If you were to look at the HTML code, the image link uses the following <a href> tag:
<a href="https://dri.es/album/niagara-on-the-lake-2017/niagara-falls-by-night-1/edit"
   class="edit-button">Edit</a>
Clicking the link doesn't open the off-canvas dialog yet. The class="edit-button" is used to style the button with CSS and to overlay it on top of the image.
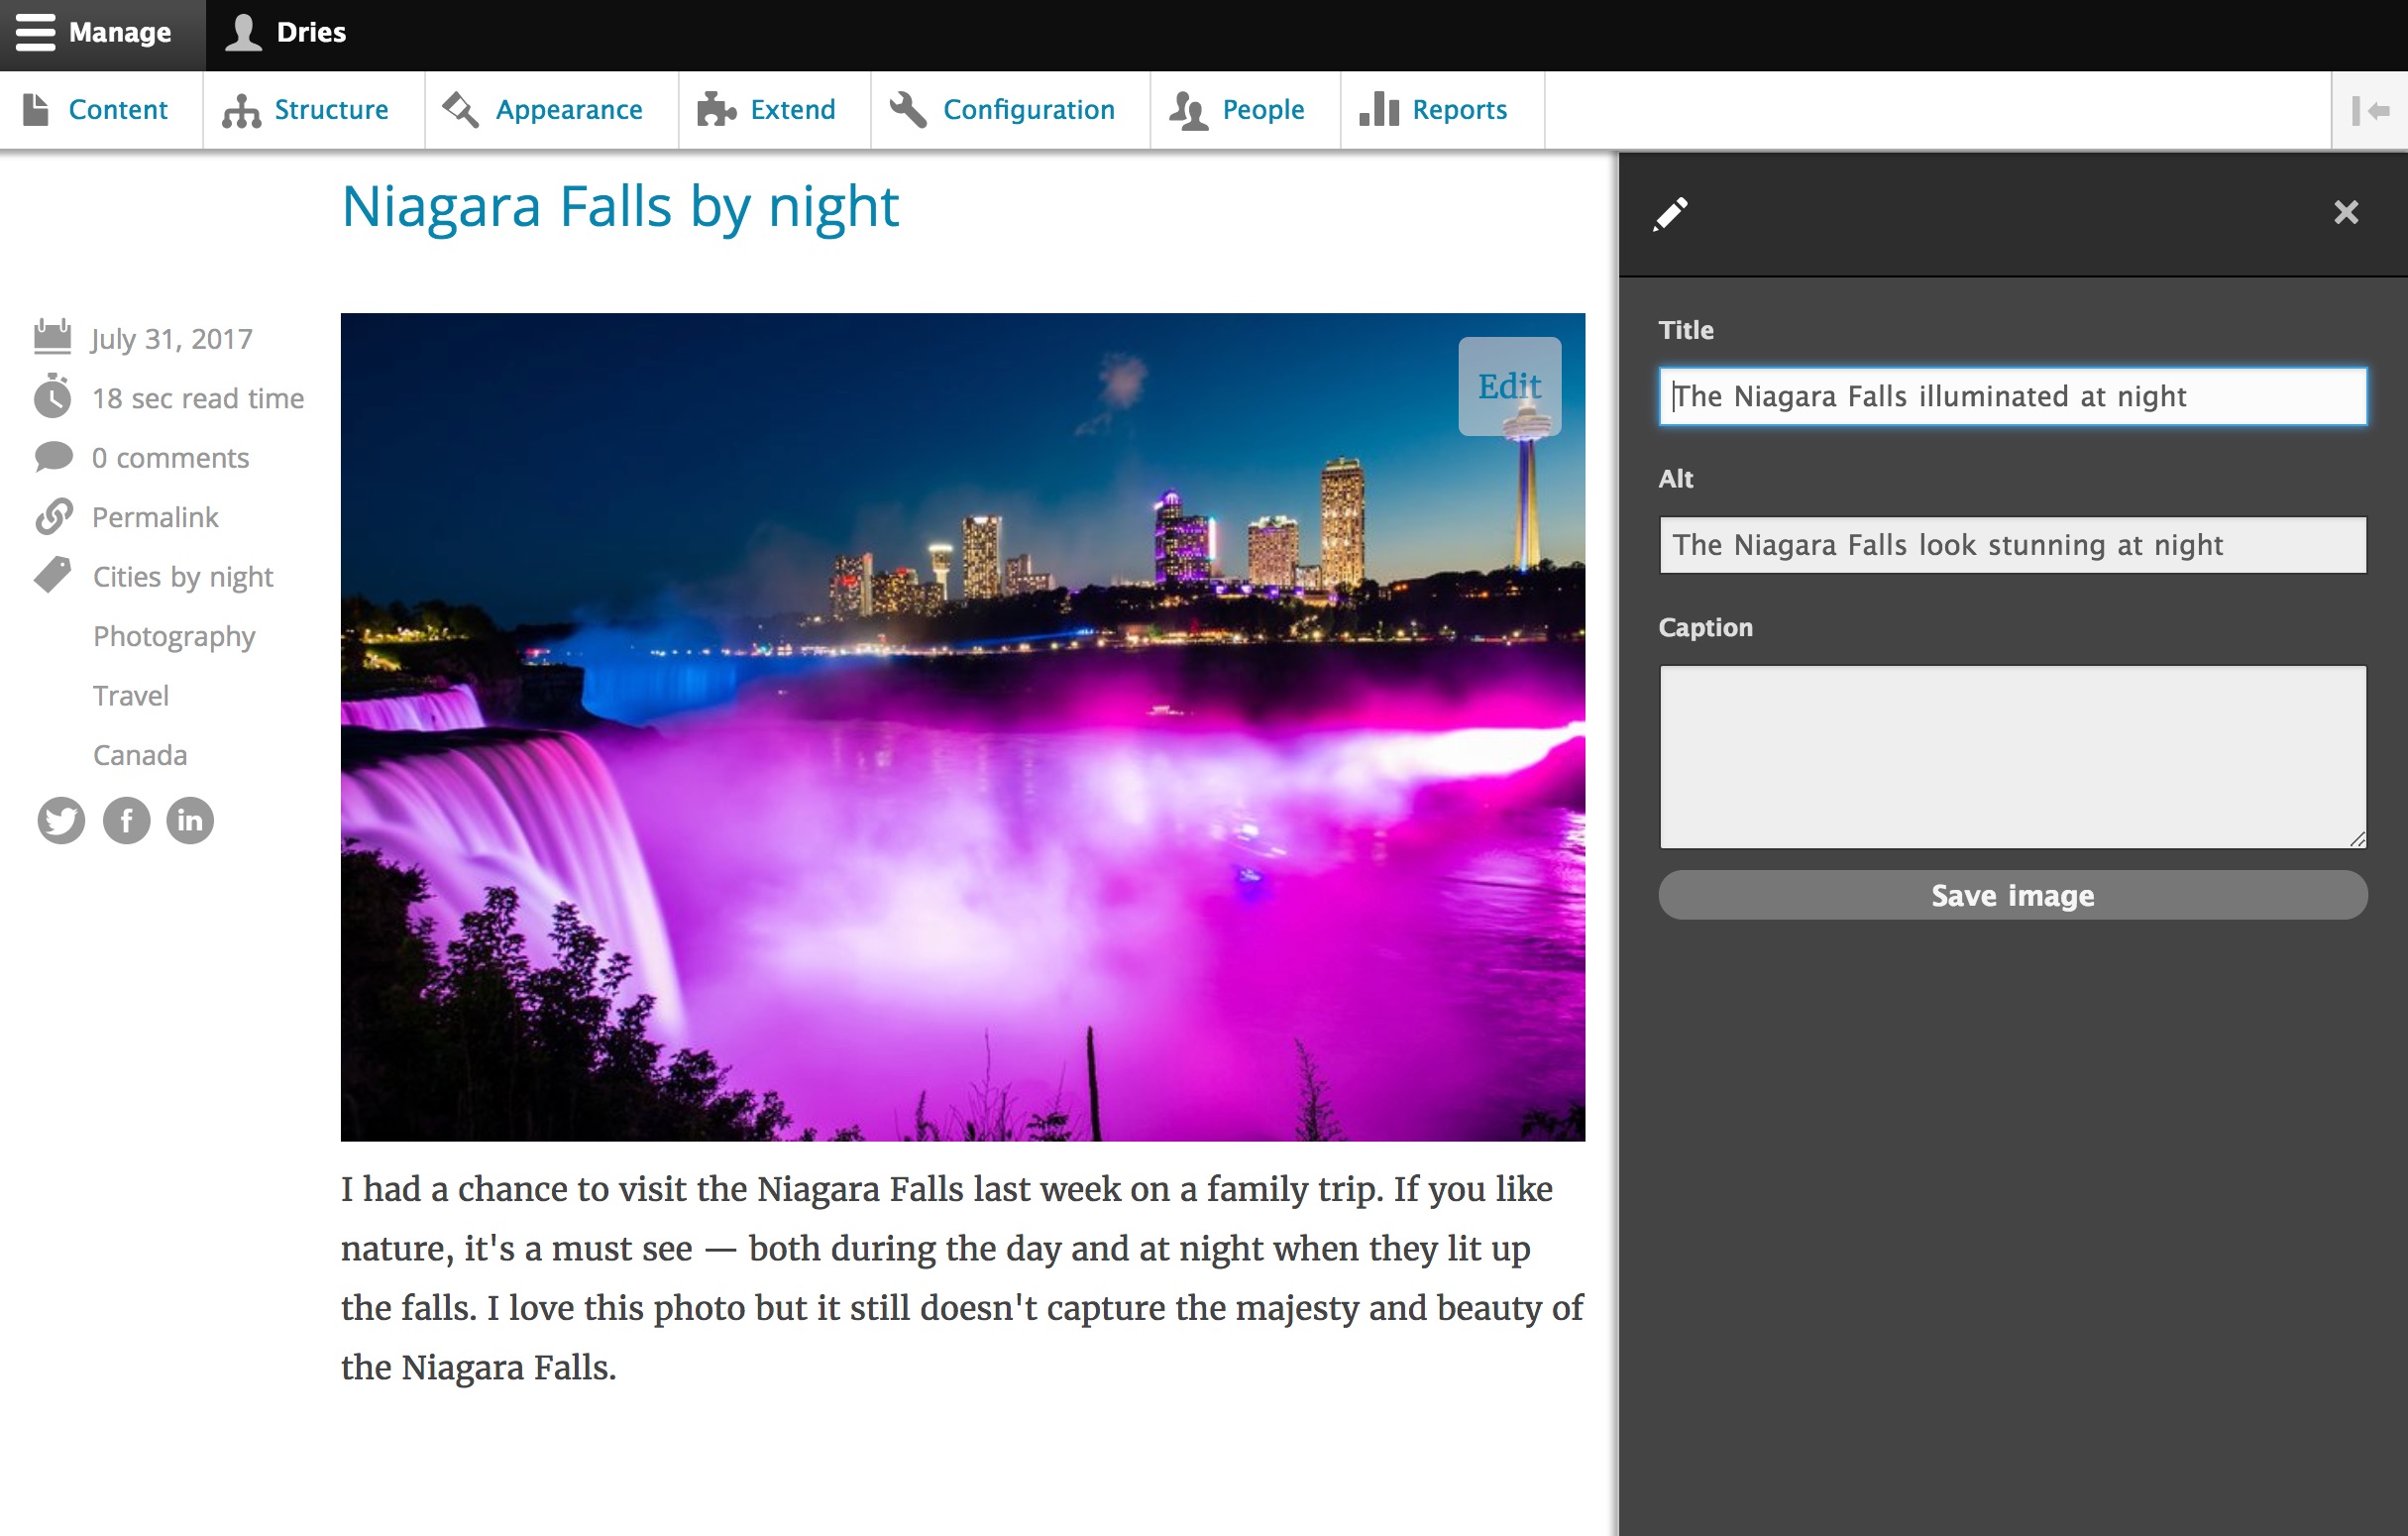
Step 3: Opening the off-canvas dialog
Next, we have to tell Drupal to open the form in the off-canvas dialog when the "Edit"-link is clicked. To open the form in the off-canvas dialog, extend that <a href> tag to:
<a href="https://dri.es/album/niagara-on-the-lake-2017/niagara-falls-by-night-1/edit?destination=current-path"
class="edit-button use-ajax" data-dialog-type="dialog" data-dialog-renderer="off_canvas"
data-dialog-options="{"width":400}">Edit</a>
Some extra HTML in the <a href> tag is all it took; it took my regular Drupal form, showed it in an off-canvas dialog, and even styled it! As I wrote above, it is easy to use the off-canvas dialog in your own modules. Hopefully you'll be inspired to take advantage of this new functionality.
There are several things being added though, so let's break it down. First we add the a class called use-ajax:
use-ajaxis the class that is necessary for any link including dialogs that use Drupal's Ajax API.
We also added some data-dialog-* attributes:
data-dialog-type="dialog"specifies that you want to open the link in a dialog. The other option you can specify ismodal. Unlike a dialog, a modal dialog restricts interaction with the current page until the modal dialog is closed.data-dialog-renderer="off_canvas"specifies how Drupal will actually render the dialog. Ifdata-dialog-rendereris not specified then the dialog will rendered with Drupal's default dialog renderer, which is a pop-up dialog (similar to the modal dialog which is used by the Views module).data-dialog-options="{"width":400}"is optional and can be used to overwrite the default off-canvas dialog properties. In this case, I'm specifying that I want the width of the off-canvas dialog to be 400 pixels instead of the default 300 pixels. Any valid jQuery UI dialog options can be sent here.?destination=current-pathspecifies the page we have to navigate back to after we close the dialog. To have the form redirect to the current page adestinationvalue must be added to the query string of the link. Redirecting the form to the current page works the same for dialog links as it does for other links to forms in Drupal. Luckily Drupal 8 provides a RedirectDestination helper service to handle this. In the example above, submitting the form would redirect you tohttps://dri.es/current-path.
You can create a link like the example above using a Drupal render array; it will open a form page in the off-canvas dialog and redirect the submitted form back to the current page:
$elements['link'] = [
  '#title' => 'Edit image',
  '#type' => 'link',
  '#url' => Url::fromRoute('album_image', ['album' => $album, 'image' => $image],
    ['query' => \Drupal::service('redirect.destination')->getAsArray()])->toString();,
  '#attributes' => [
    'class' => ['use-ajax'],
    'data-dialog-type' => 'dialog',
    'data-dialog-renderer' => 'off_canvas',
    'data-dialog-options' => Json::encode(['width' => 400]),
  ],
  '#attached' => [
    'library' => [
      'core/drupal.dialog.ajax',
    ],
  ],
];
Because the dialog functionality might not be needed on every page, Drupal won't load it unless needed. We use the #attached element to tell Drupal that we want the JavaScript dialog system to be loaded for this page. It's a bit more work, but it keeps Drupal efficient.
Improving the developer experience
Applying the off-canvas dialog to my blog and writing this tutorial uncovered several opportunities to improve the developer experience. It seems unnecessary to set class' => ['use-ajax'] when data-dialog-type is set. Why do I need to specify both a data-dialog-type and a data-dialog-renderer? And why can't Drupal automatically attach core/drupal.dialog.ajax when data-dialog-type is set?
In discussing these challenges with Ted Bowman, one of the developers of the off-canvas dialog, he created an issue on Drupal.org to work on off-canvas developer experience improvements. Hopefully in a future version of Drupal, you will be able to create an off-canvas dialog link as simply as:
$link = Link::createFromRoute('Edit image', 'album_image',
   ['album' => $album, 'image' => $image])->openInOffCanvasDialog();
$elements['link'] = $link->toRenderable();
Special thanks to Ted Bowman and Samuel Mortenson for their feedback to this blog post.
— Dries Buytaert